Experimenting with a Track Running solution using "Snap to Route"
-
As someone who trains regularly on the track and hoping Suunto to come up with a proper Track Running mode, I decided to experiment with a solution using the “Snap to Route” feature which I don’t think I’ve seen on this forum yet.
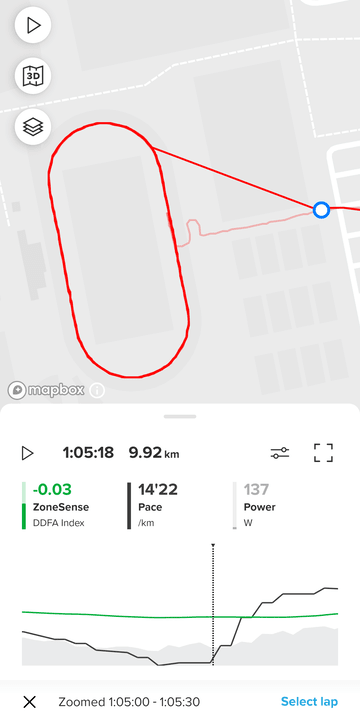
To my surprise it works rather nicely. You can see results without the route and how snapping helps distance and laps match closer to reality with “cleaner” data similar to what a dedicated Track Running mode from competitors would produce. It also works repeatedly, ending at/near the finish line and beginning the route again when crossing it.
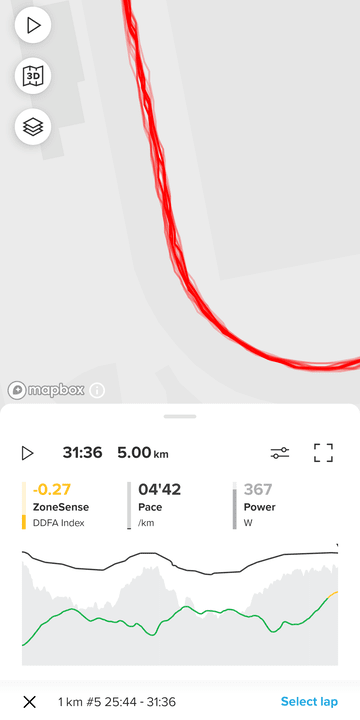
No route
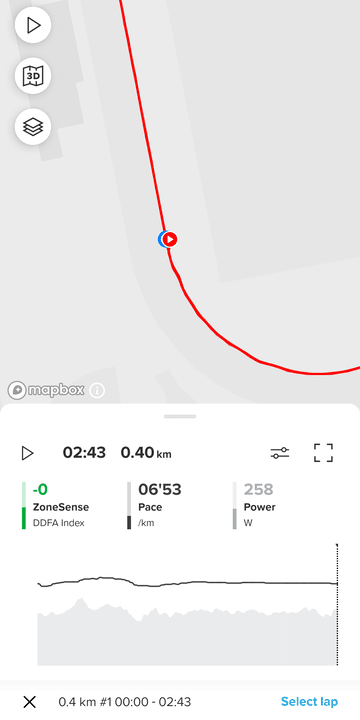
Snapped after 1 lap
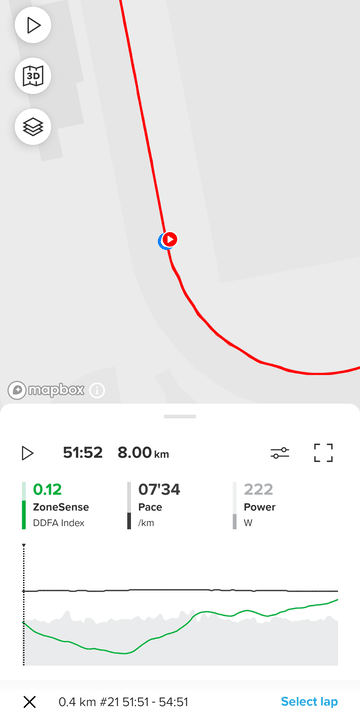
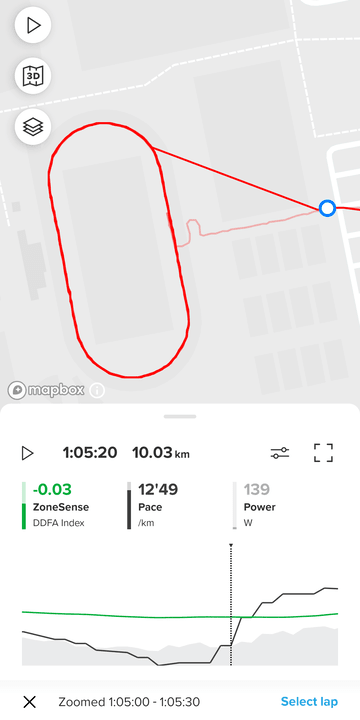
Snapped after 20 laps
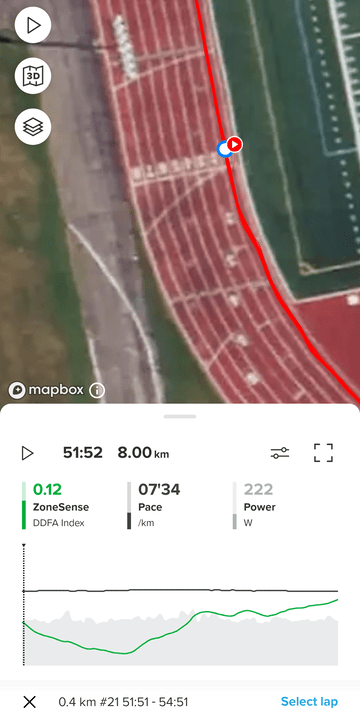
Snapped after 20 laps, satellite view
To help simplify things I make sure that I always run on Lane 1 beginning at the finish line with the distance of 1 lap equaling 400m. While depending on the specifications of the track that would likely mean running closer to the inner edge than the centerline of the lane, as is the World Athletics standard.
I also tested the scenario where I would start an activity with Snap to Route on, warm up along a path leading to the track, do reps on the track, then leaving it again to cool down. In this case the result is not ideal since it took a while after deviating from the track itself for the snap to release and cause my route to jump along an imaginary line (see comparison to actual path taken), probably due to a predefined radius for snapping to de/activate—if any developers could enlighten me here.
Soon after leaving track, route still snapped

Some time after leaving track, route jumped
Some time after leaving track, distance also jumped
The question, of course, is how to generate the route for your specific track. I’m not from a coding background but have experience in GIS (geographic information systems), so with the right (and free) tools it can be achieved.
For those of you interested and do not mind the technical depth of such let me know and I will write up a more detailed guide.
-
@Jonathan-C just the kind of nerdy post I needed to break up an audit.
If you do a route that goes from your house, to the track, and back, does that fix the problem you showed above?
You should absolutely share your GIS workflow.
-
Nice work! I did something similar with 9 Baro back in the day. Messaging from the watch for “reaching the end” of your route (not sure about the exact wording for English) ended up being a bit too annoying but I still wondered how this couldn’t be tweaked into a proper track mode.
-
Guide to creating GPX route for a specific running track
Disclaimer
The following is technical and may require a significant amount of time and effort.
We will be using a track in Helsinki near Suunto HQ as example.
There are multiple ways to achieve the same results; this method may involve more steps than necessary but takes a visual approach while maintaining high levels of precision.
Any comments and suggestions are welcome.Software
macOS or Windows
QGIS: https://qgis.org/download/
Rhino free trial: https://www.rhino3d.com/download/
Text editor e.g. TextEdit or Notepad
Web browserPART 1. QGIS
1.1
Install and launch QGIS.
From the “Manage and Install Plugins” dialog under “Plugins” menu, look for and install “QuickMapServices” (QMS).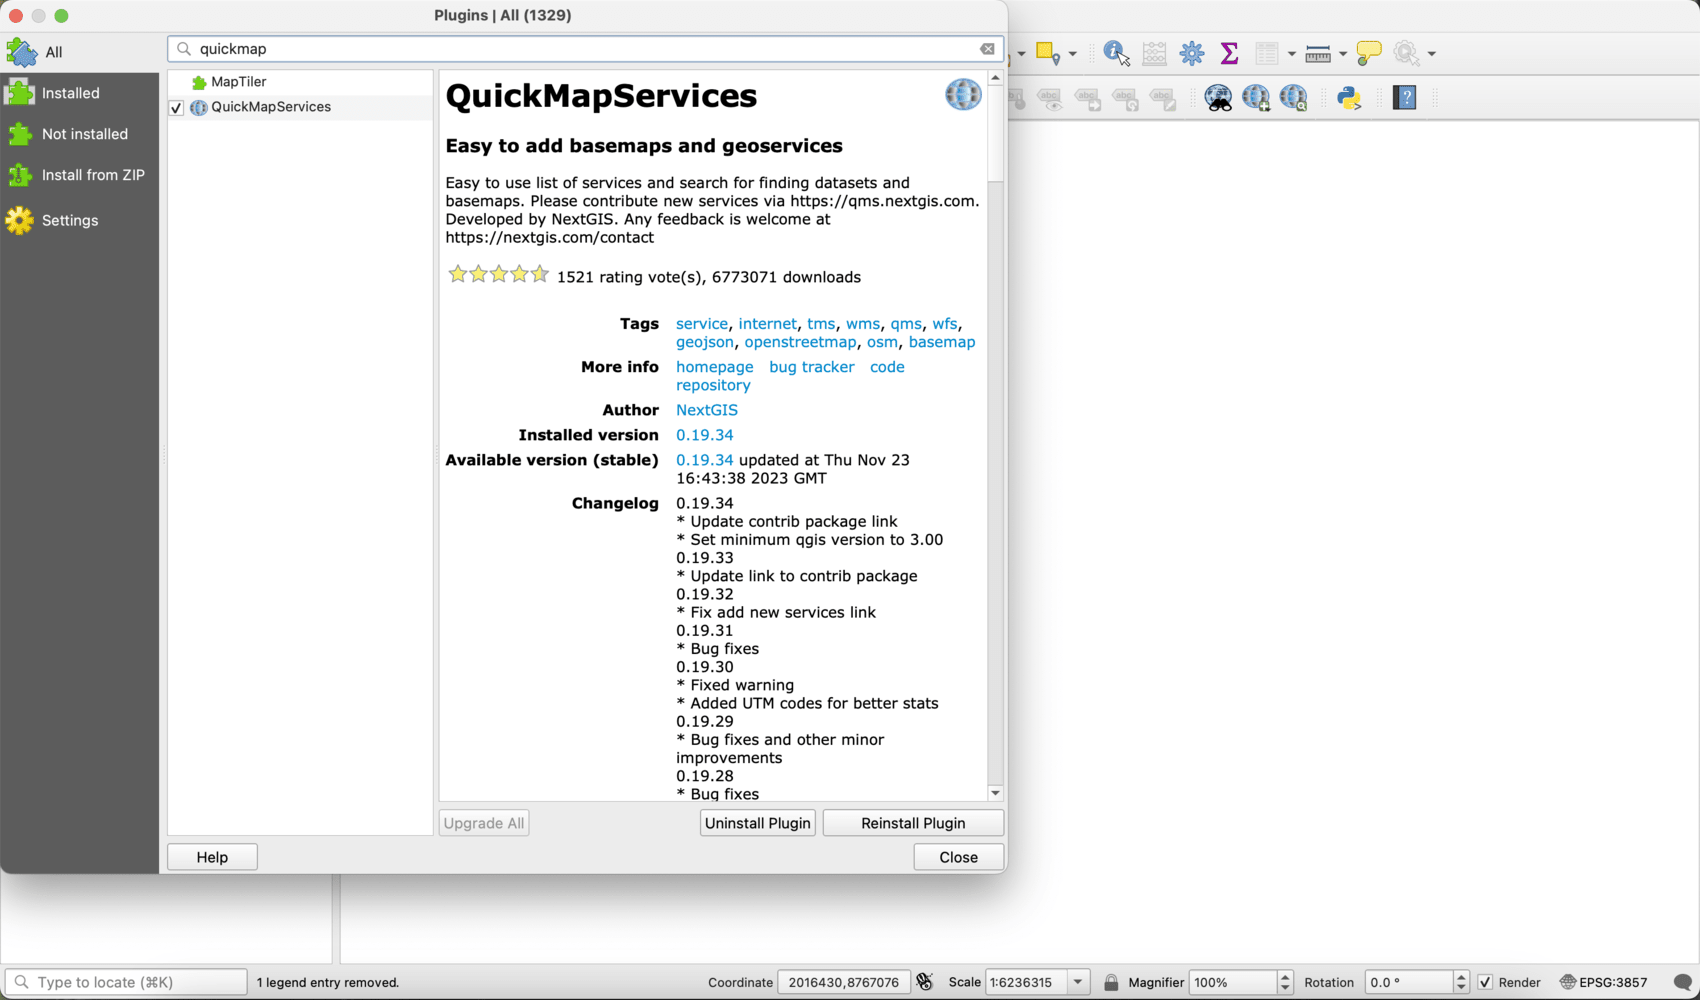
1.2
We should see QMS options added to the QGIS toolbar.
In the dropdown menu with the “+” symbol, select “Google Satellite”. This will add a satellite basemap to the main viewport.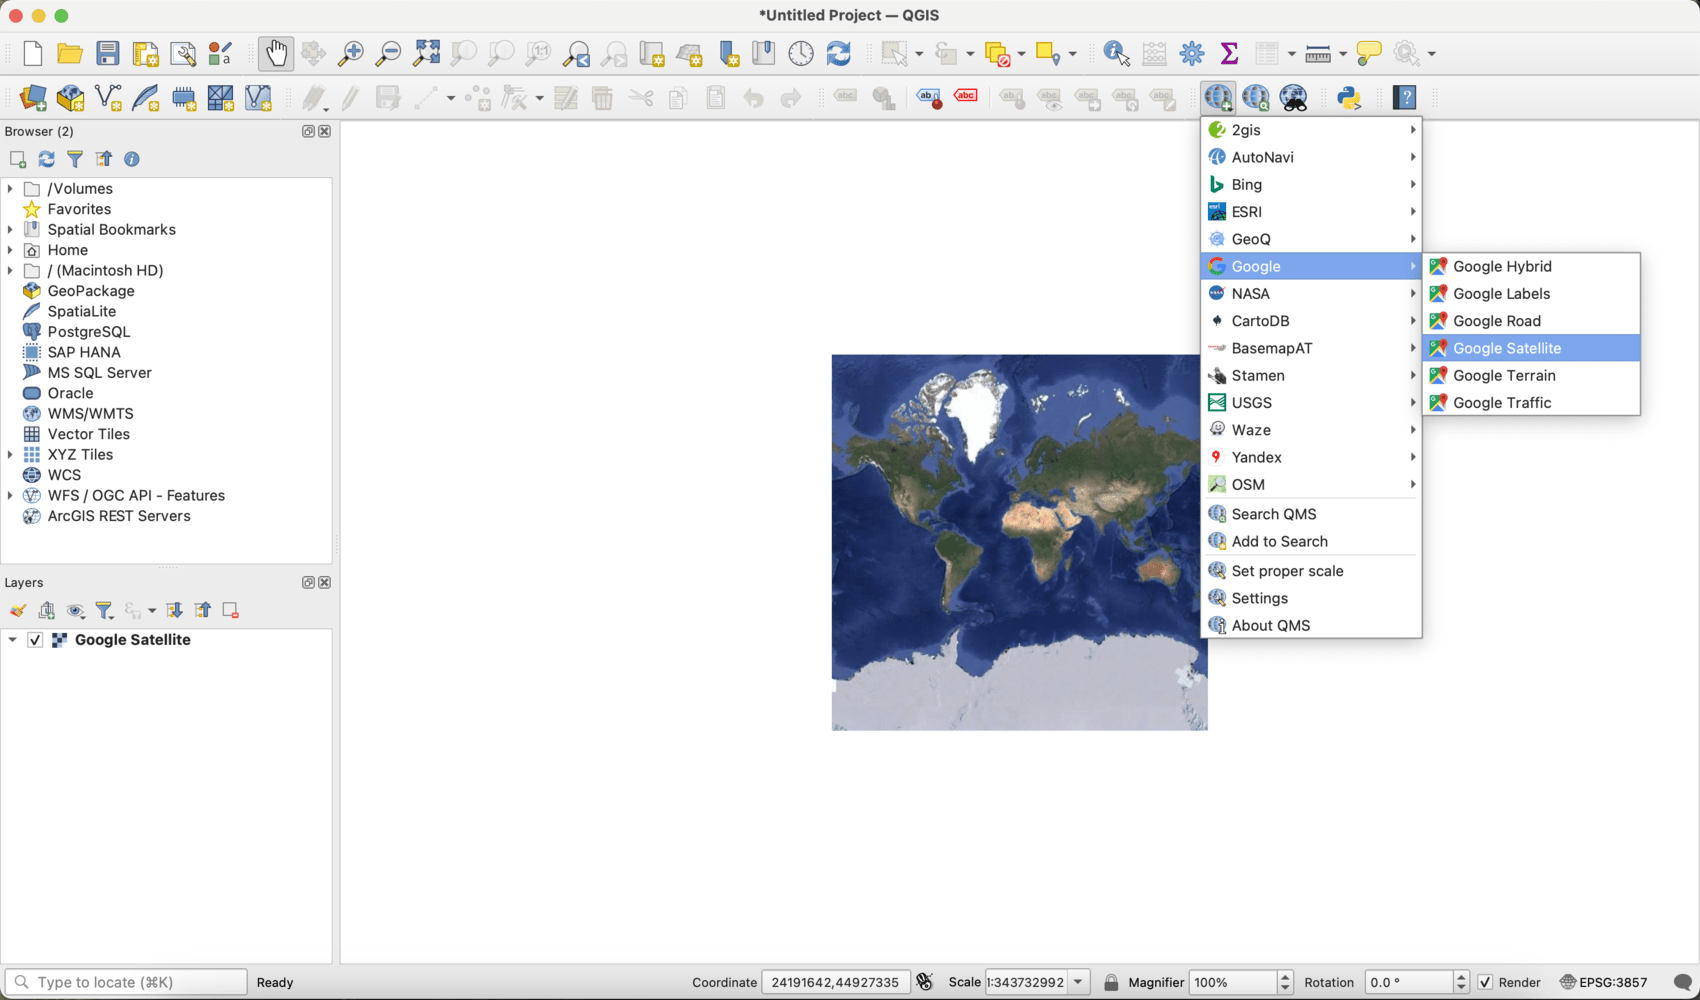
1.3
Locate our selected running track by geographic coordinates, e.g. on Google Maps by right clicking its location.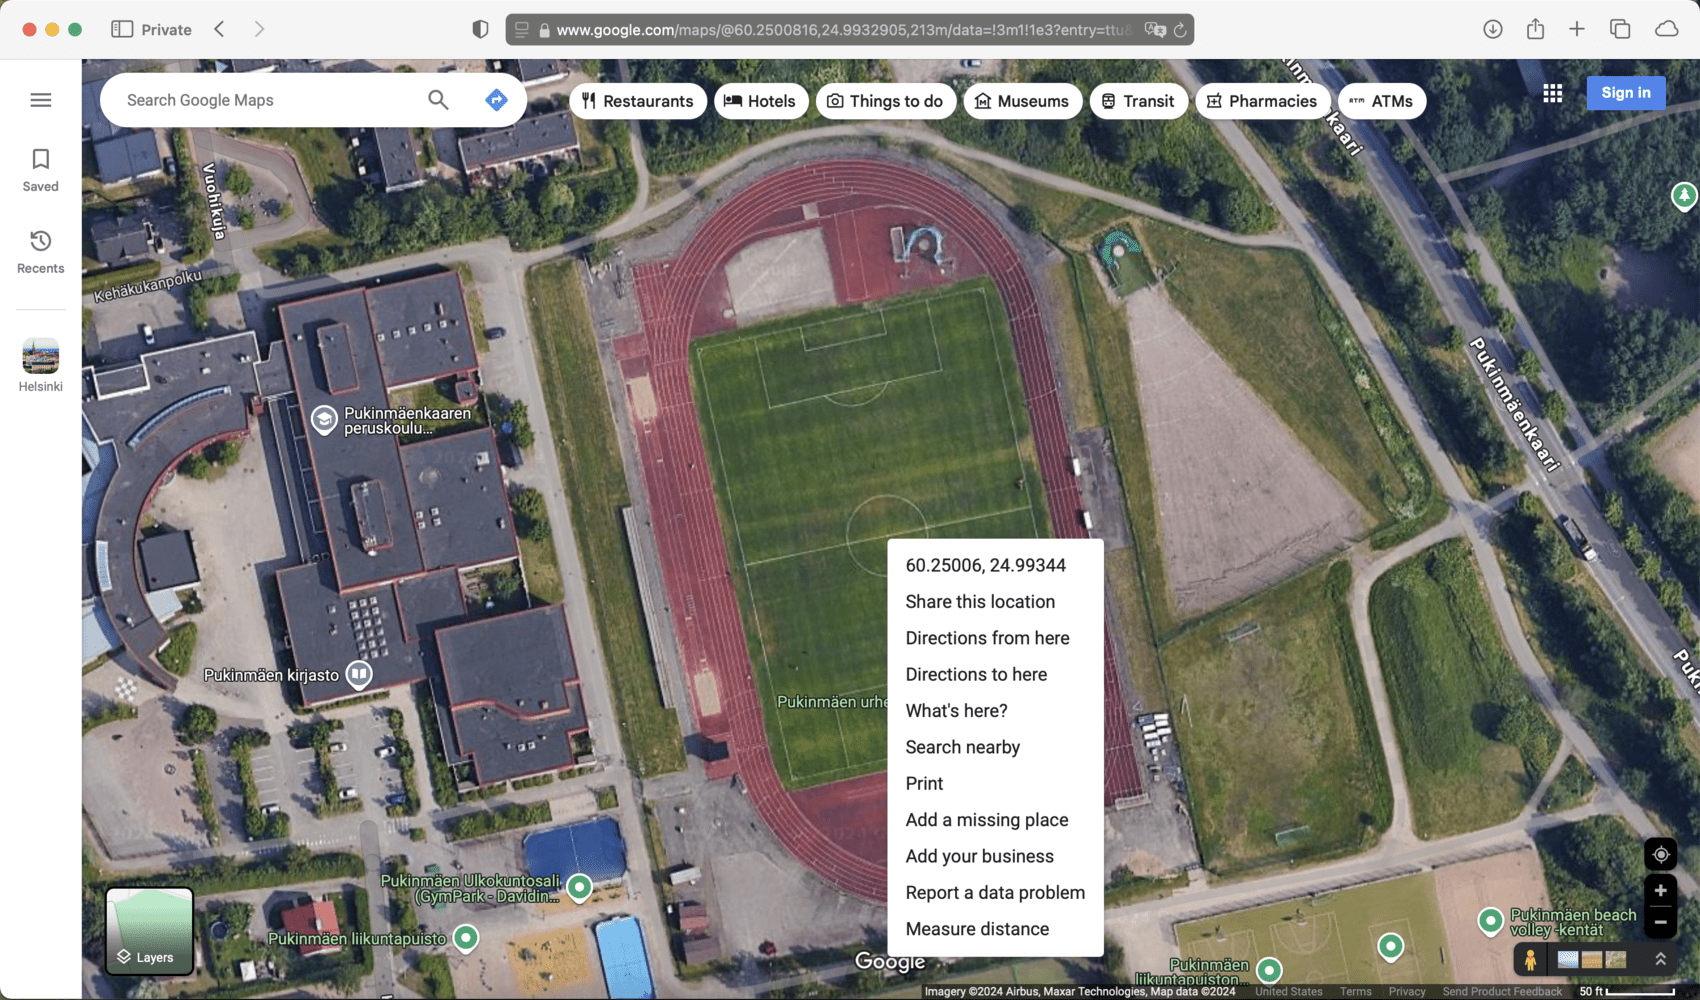
1.4
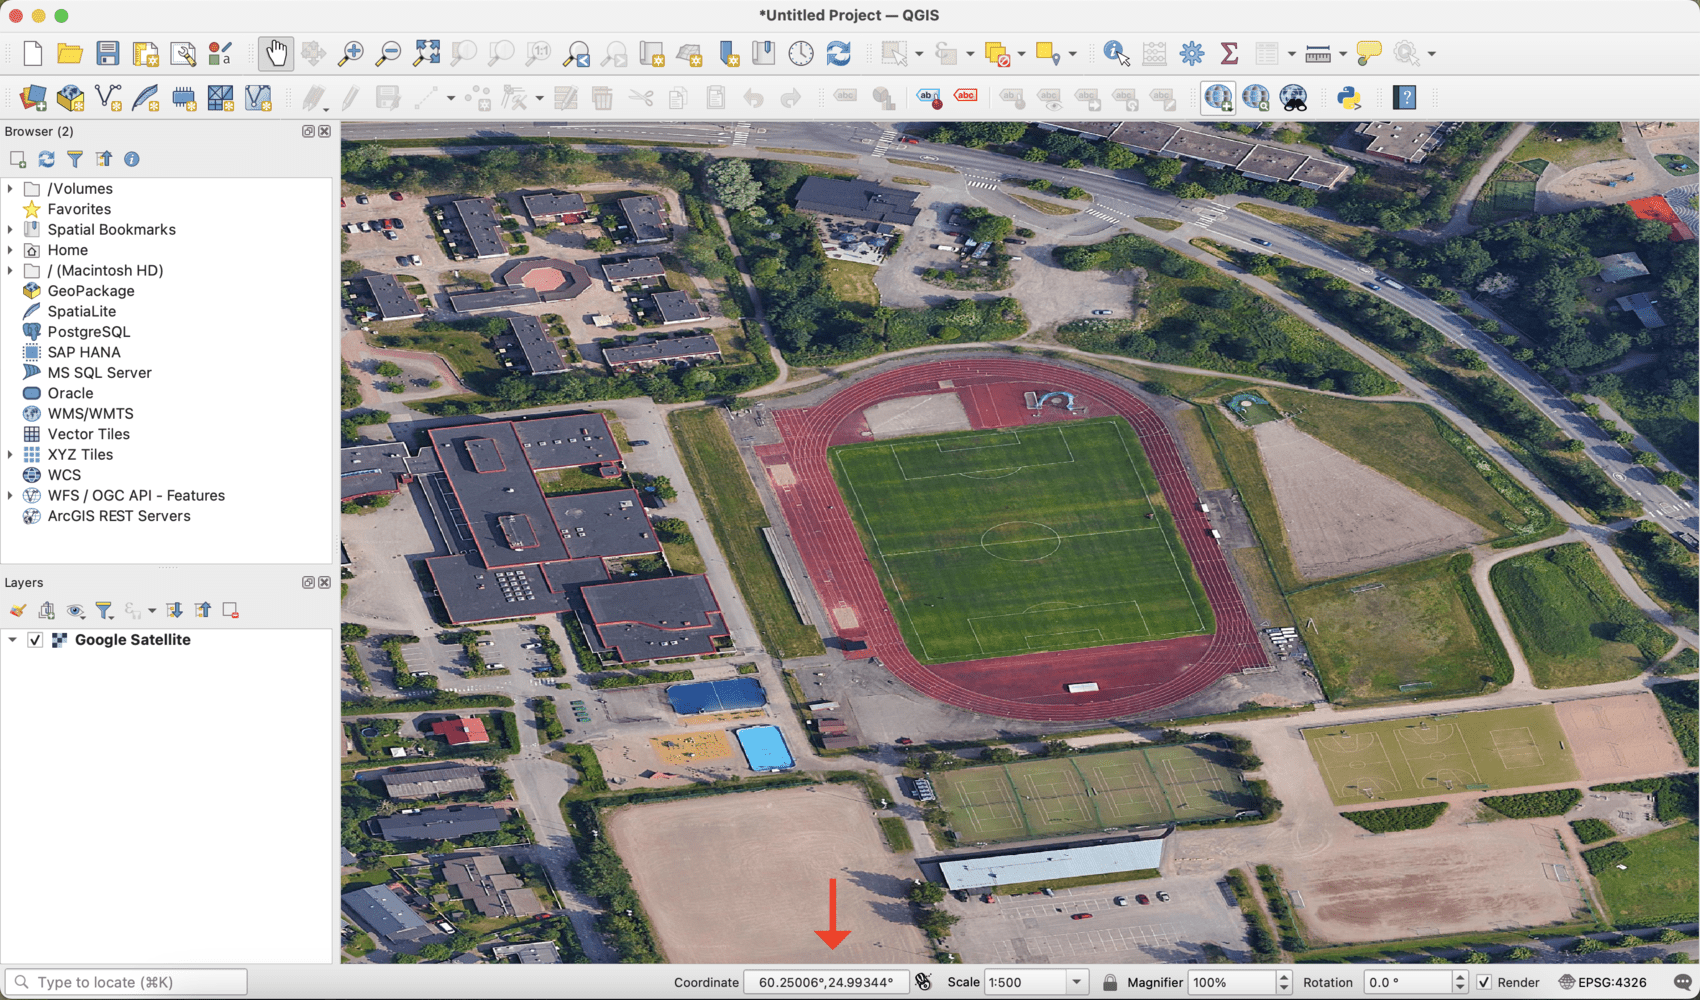
In QGIS, temporarily switch the coordinate system to EPSG:4326 (WGS 84) by opening the “CRS” dialog from the lower right corner, so that we can enter the coordinates into the bottom bar field.
In this case it will be approximately 60.25°, 25.00°.
Note the satellite image will appear distorted at this point.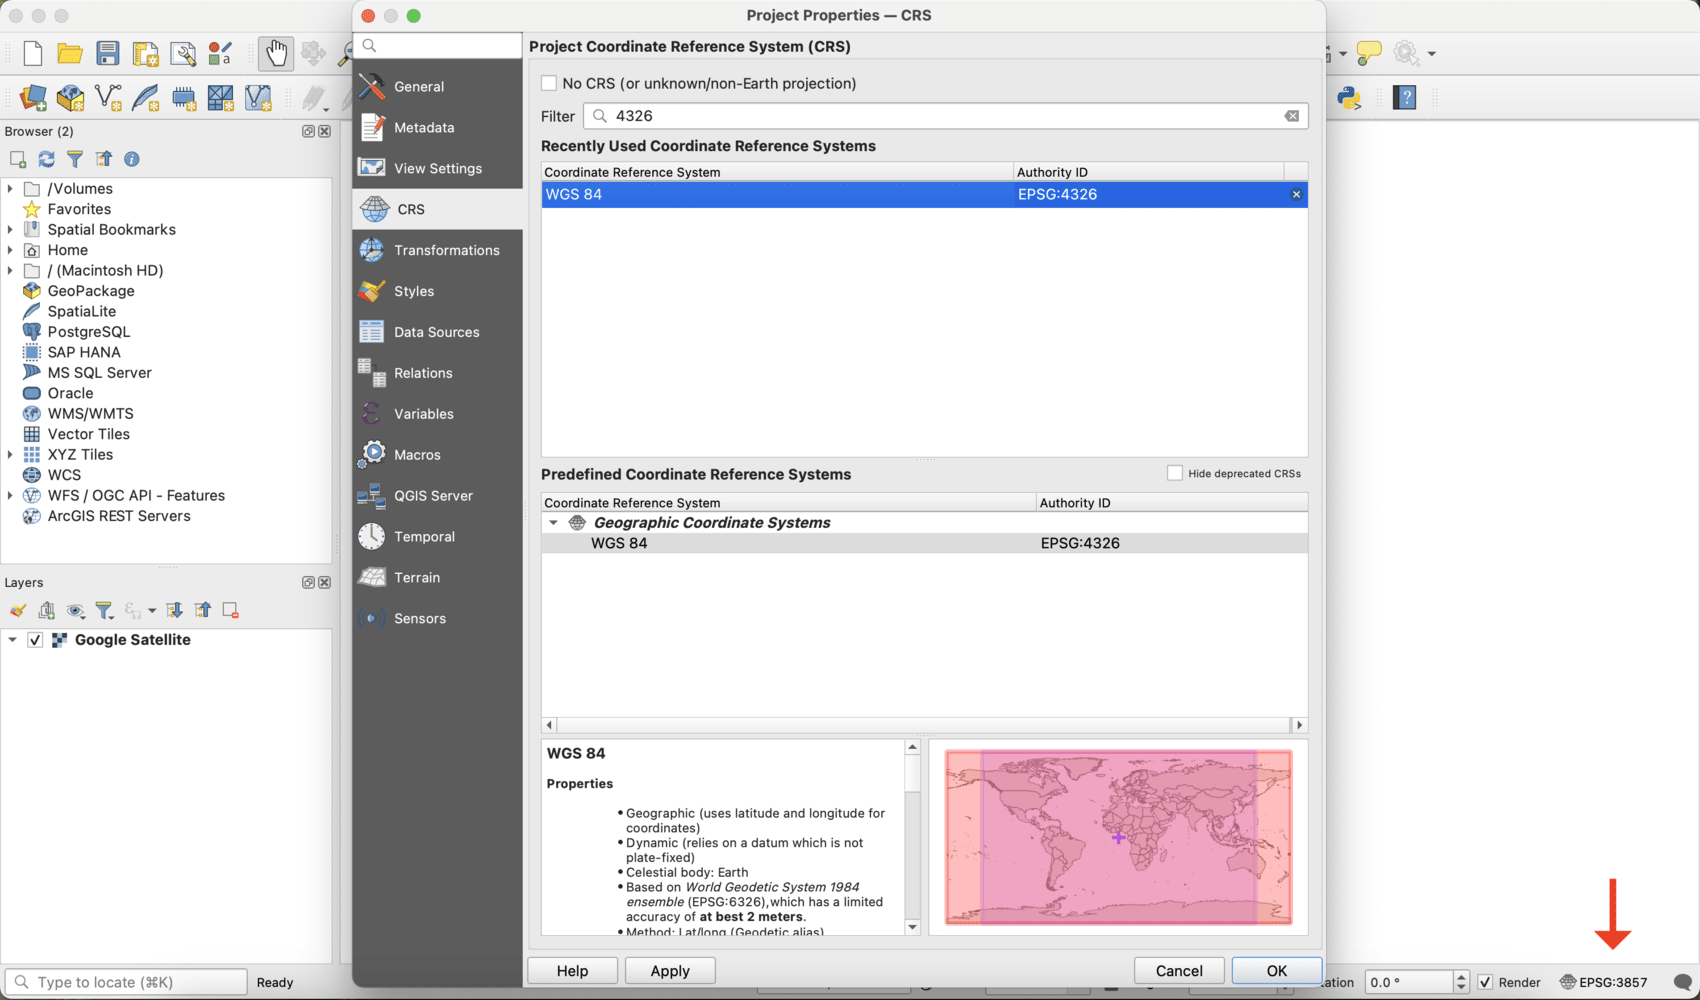
1.5
Identify the local coordinate system used for the location of our track.
It is important to select a meter-based system, not latitude/longitude or foot (for the US).
In this case EPSG:3132 (ETRS89 / ETRS-GK25FIN) is the best fit for our purposes, so change that again according to 1.4. For more information see this reference.
We should now see the satellite image properly projected with the track nice and square. Coordinates are now in meters.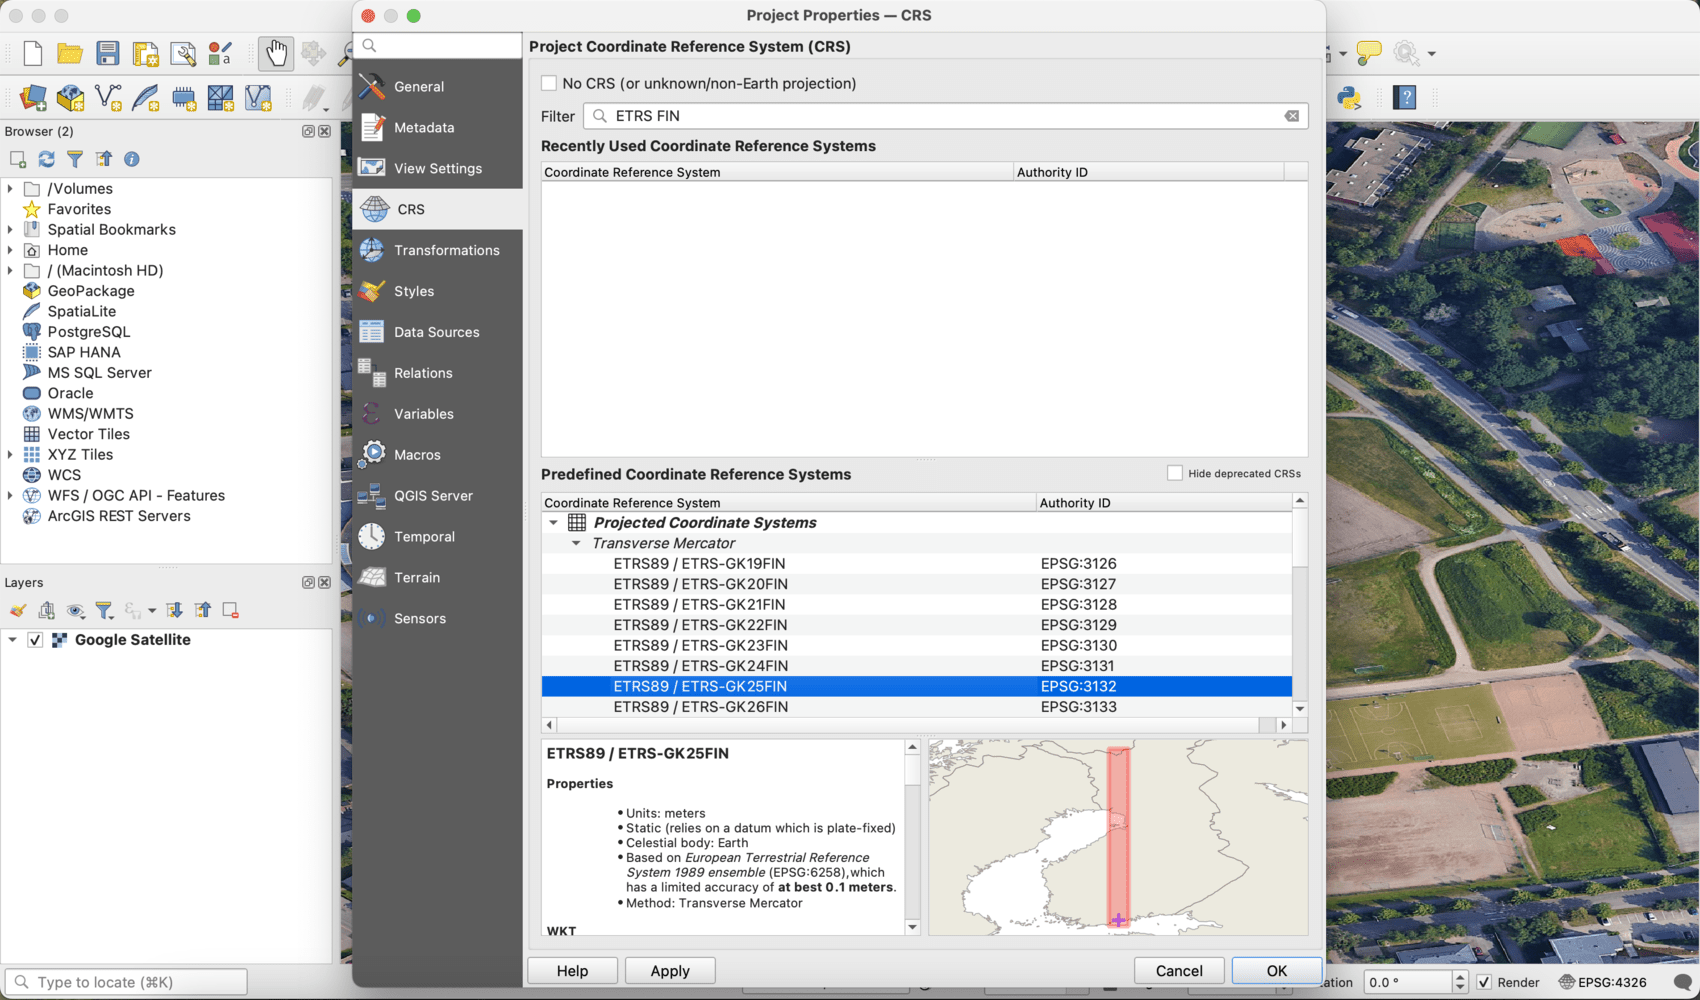
1.6
Zoom until we can pinpoint the absolute center of the track and identify its coordinates. In most cases this should be conveniently found at the center of the field located within the track.
In this case we have the center of the football pitch at 6681934.00, 499637.00. Save this as we will return to it several times later.
Set the Scale back to 1:1000 in the bottom bar so the track fits within the viewport.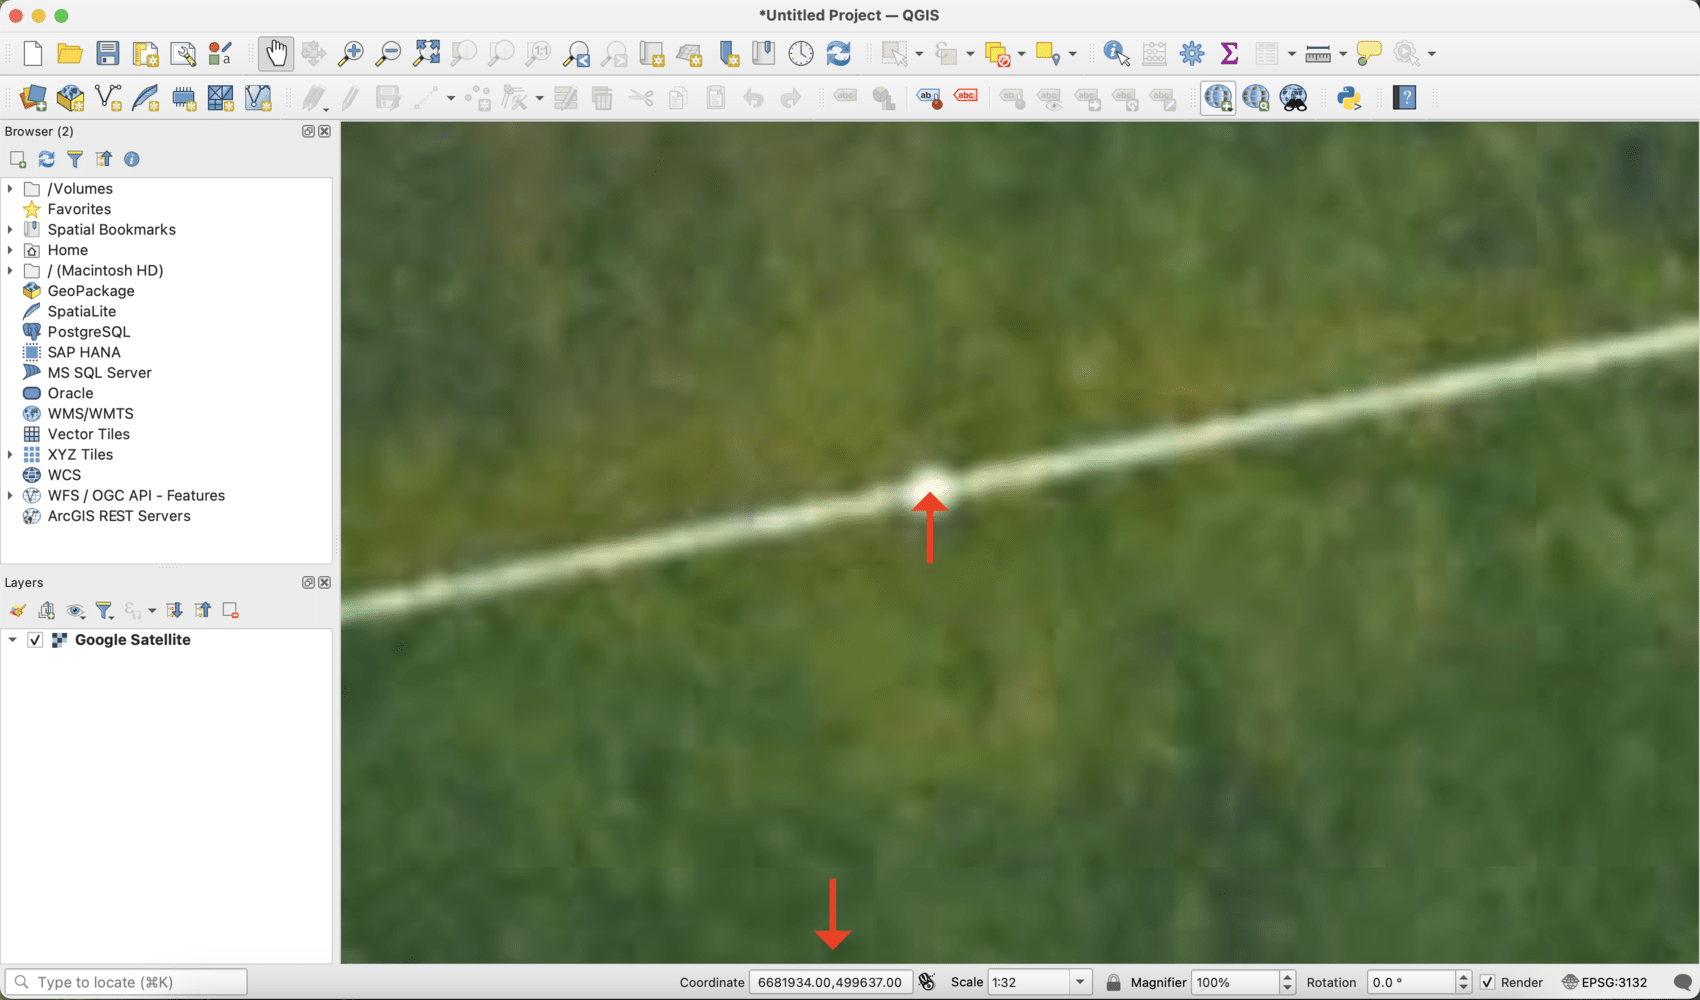
1.7
Under “Project” menu and “Import/Export” select “Export Map to Image…”
Make sure 1:1000 is selected for Scale.
Using the coordinates in 1.6 add and subtract 100 from each number to get the extent of a square that will be 200m x 200m.
In this case we will input North 6682034.00, South 6681834.00, East 499737.00, West 499537.00.
Select Resolution at 600 dpi (or 300 for smaller file) and the Output width/height should be 4800 (or 2400) px.
Uncheck all 3 boxes below and click Save. Choose JPG/JPEG/PNG and export the image to a desired location from the system dialog.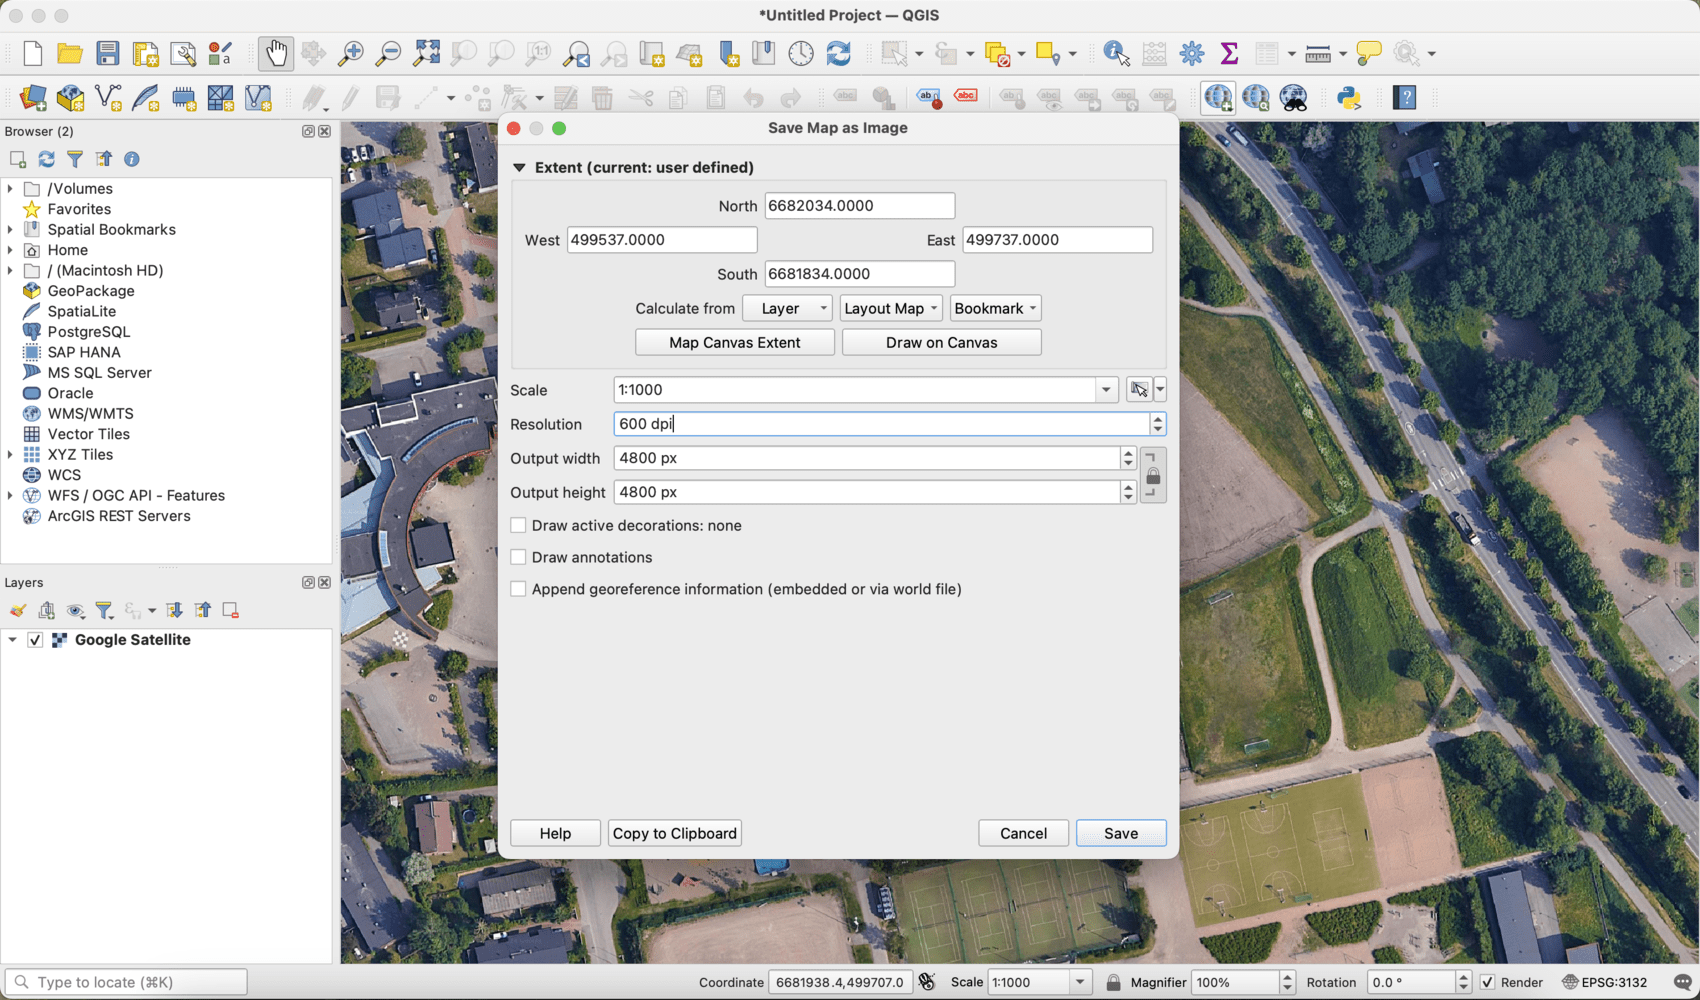
1.8
We now have an image file of the 200m x 200m area centered on the track.
Save the QGIS project at a desired location.
PART 1 ends here, as we will bring this image into Rhino to construct a vector graphic for the track itself.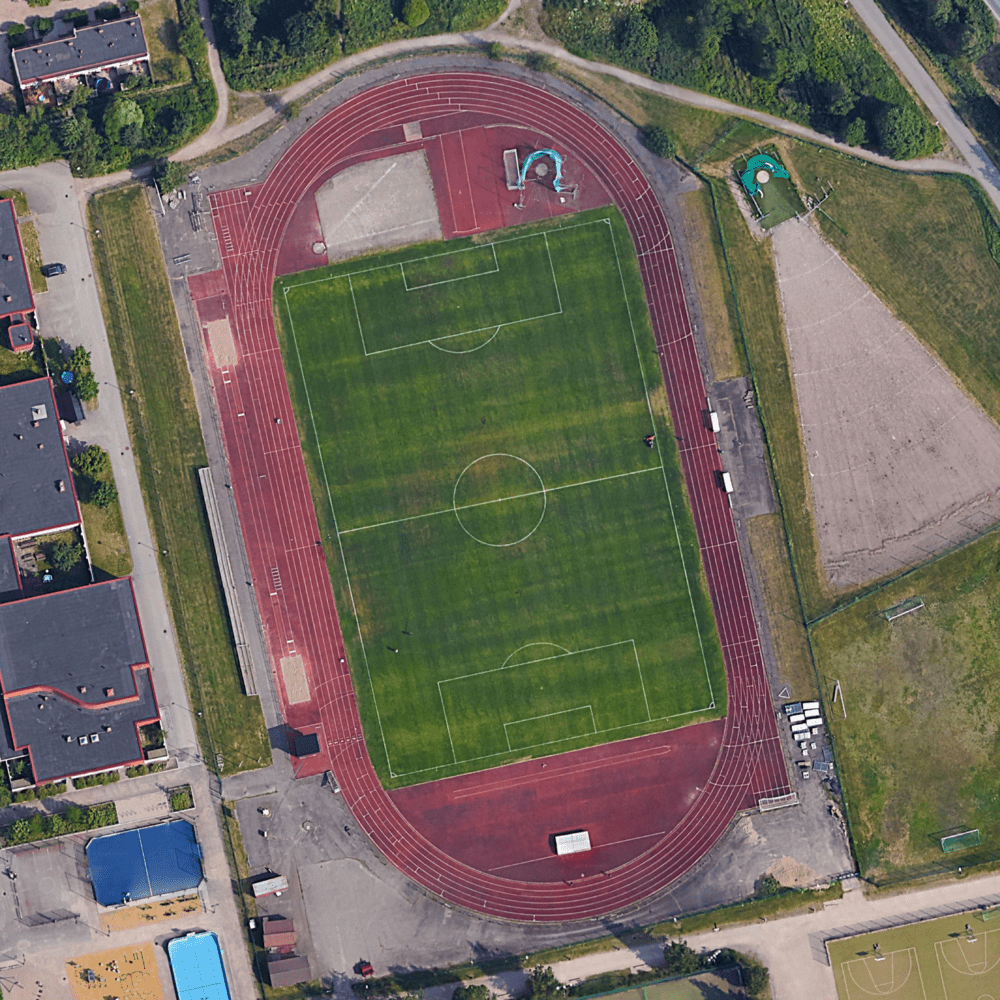
Stay tuned for PART 2 to follow.
-
@jussim nice! Do you still remember how you created the route back then?
-
@Ze-Stuart haven’t tried this. Theoretically it should but I’m not sure how it will handle that junction of the path and the track, like whether it will stick to just the track part if I keep doing laps.
Current: Ocean, Vertical Titanium Solar
Past: 9 Baro, Spartan Ultra, Ambit3 Peak Sapphire -
@Jonathan-C Oh yeah, nothing fancy at all: walked real carefully around the track and created route from that activity
")
-
@jussim said in Experimenting with a Track Running solution using "Snap to Route":
@Jonathan-C Oh yeah, nothing fancy at all: walked real carefully around the track and created route from that activity
This is the so-called „brute force“ approach.

-
@Jonathan-C really interesting seeing how you’re teaching the software about the world.
Looking forward to part 2, where I’m curious to find out if you have to pre-plan the number of laps and incorporate that into your route. Spoilers!
Hello! It looks like you're interested in this conversation, but you don't have an account yet.
Getting fed up of having to scroll through the same posts each visit? When you register for an account, you'll always come back to exactly where you were before, and choose to be notified of new replies (either via email, or push notification). You'll also be able to save bookmarks and upvote posts to show your appreciation to other community members.
With your input, this post could be even better 💗
Register Login